Introduction
In this tutorial we’ll go demonstrate how to create an Excel VBA Listbox. Listboxes can make your worksheets more usable for your users and yourself. Let’s jump right in!
The Excel VBA Listbox
A Listbox is another name for a dropdown where the user can select the value from a list of items.
Steps in creating Listbox:
- Go to your **Developers tab**.

- Click on **Insert**.

- Under **ActiveX Controls**  click on ***List Box***.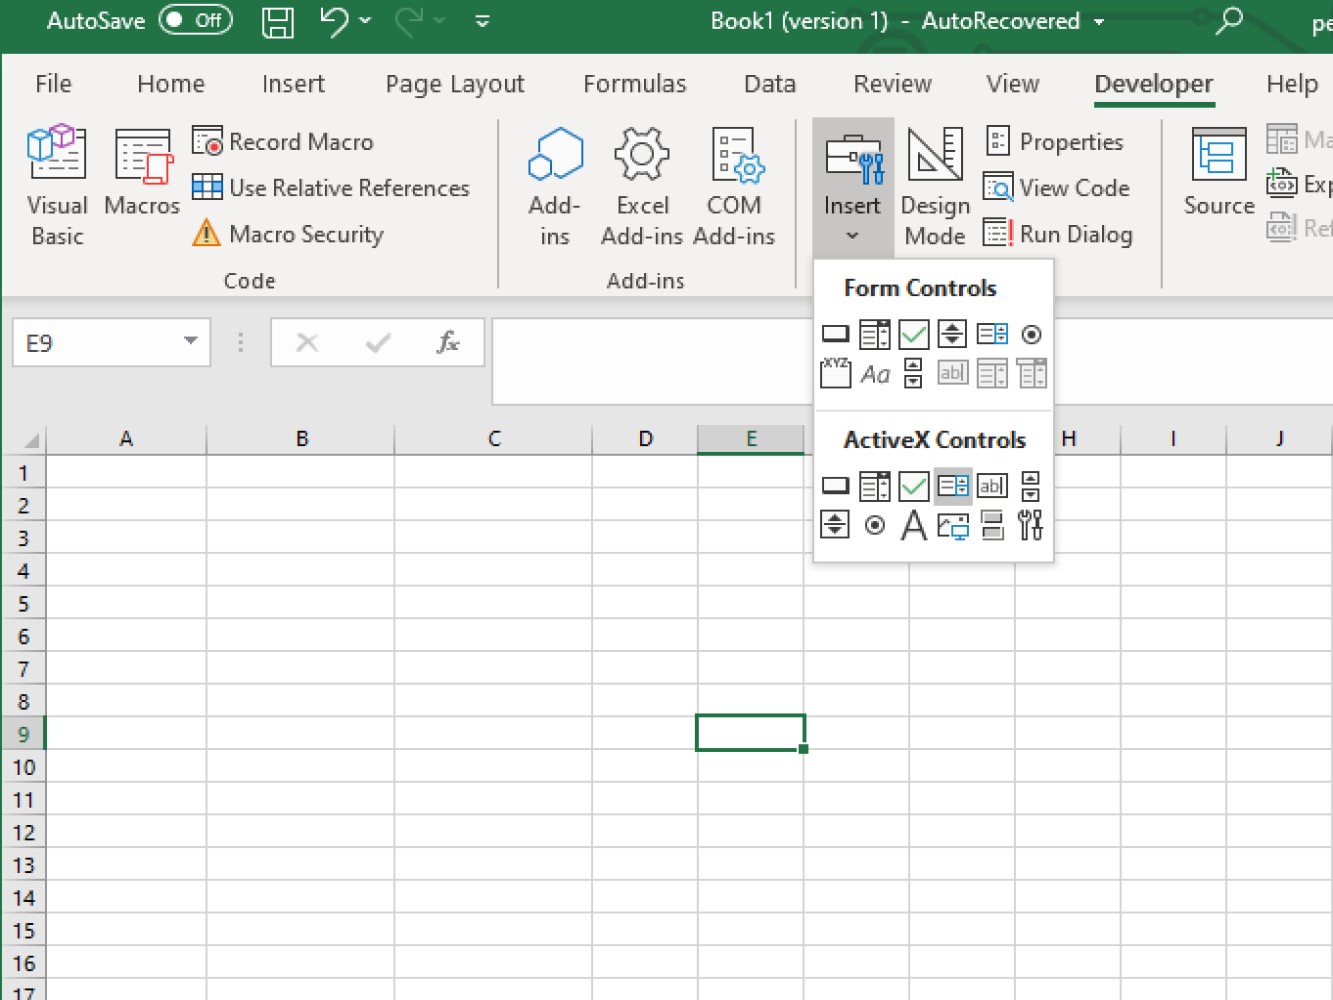
- Click on your worksheet where you wanted your list box to be located.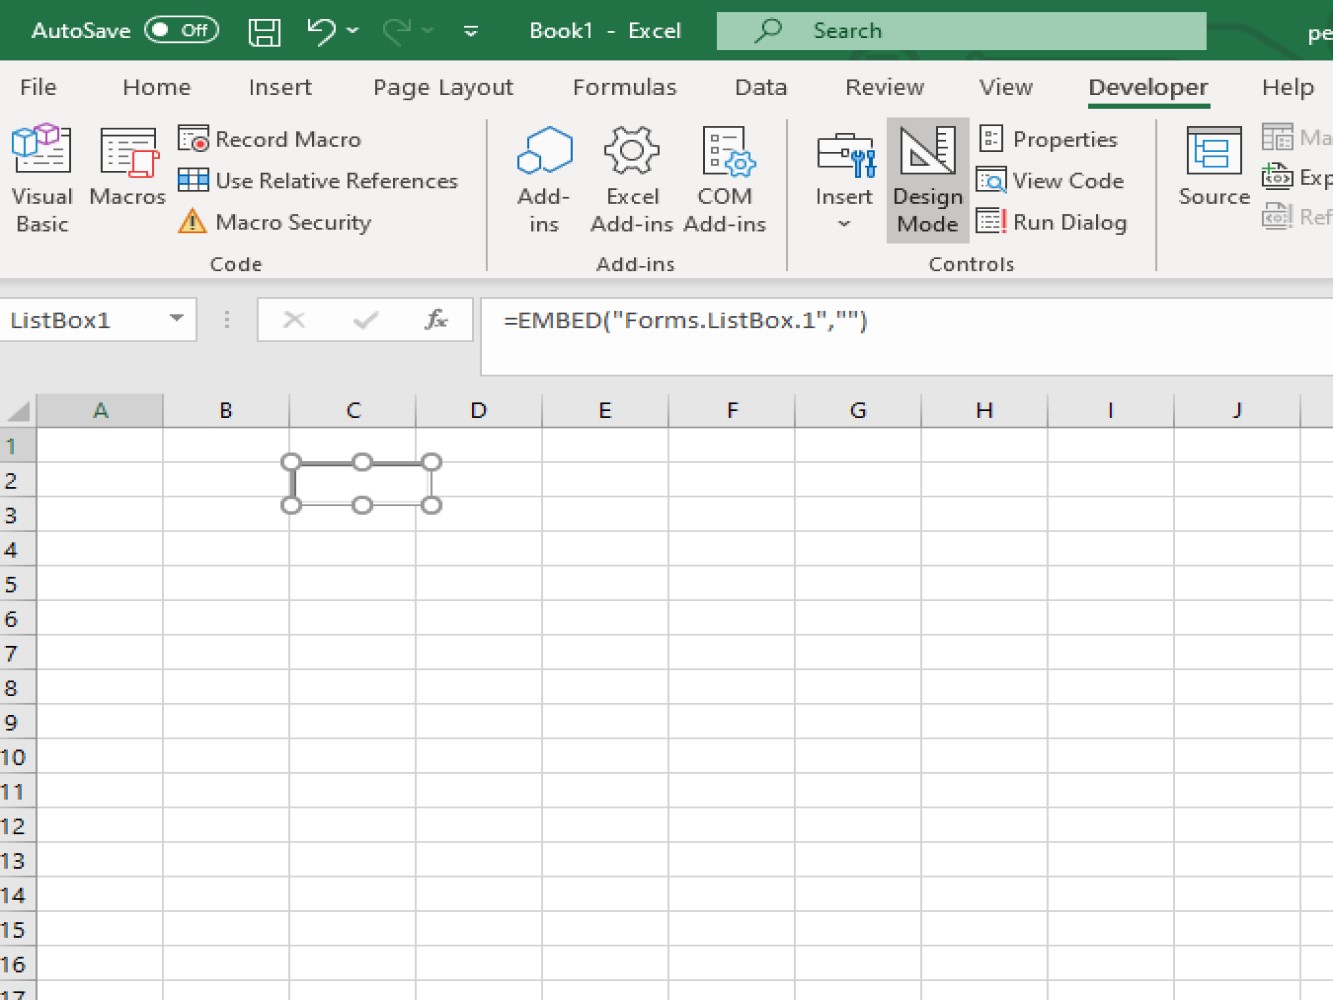
- If you want to change the name of your listbox you can go to the properties and change the name. See the screenshot below: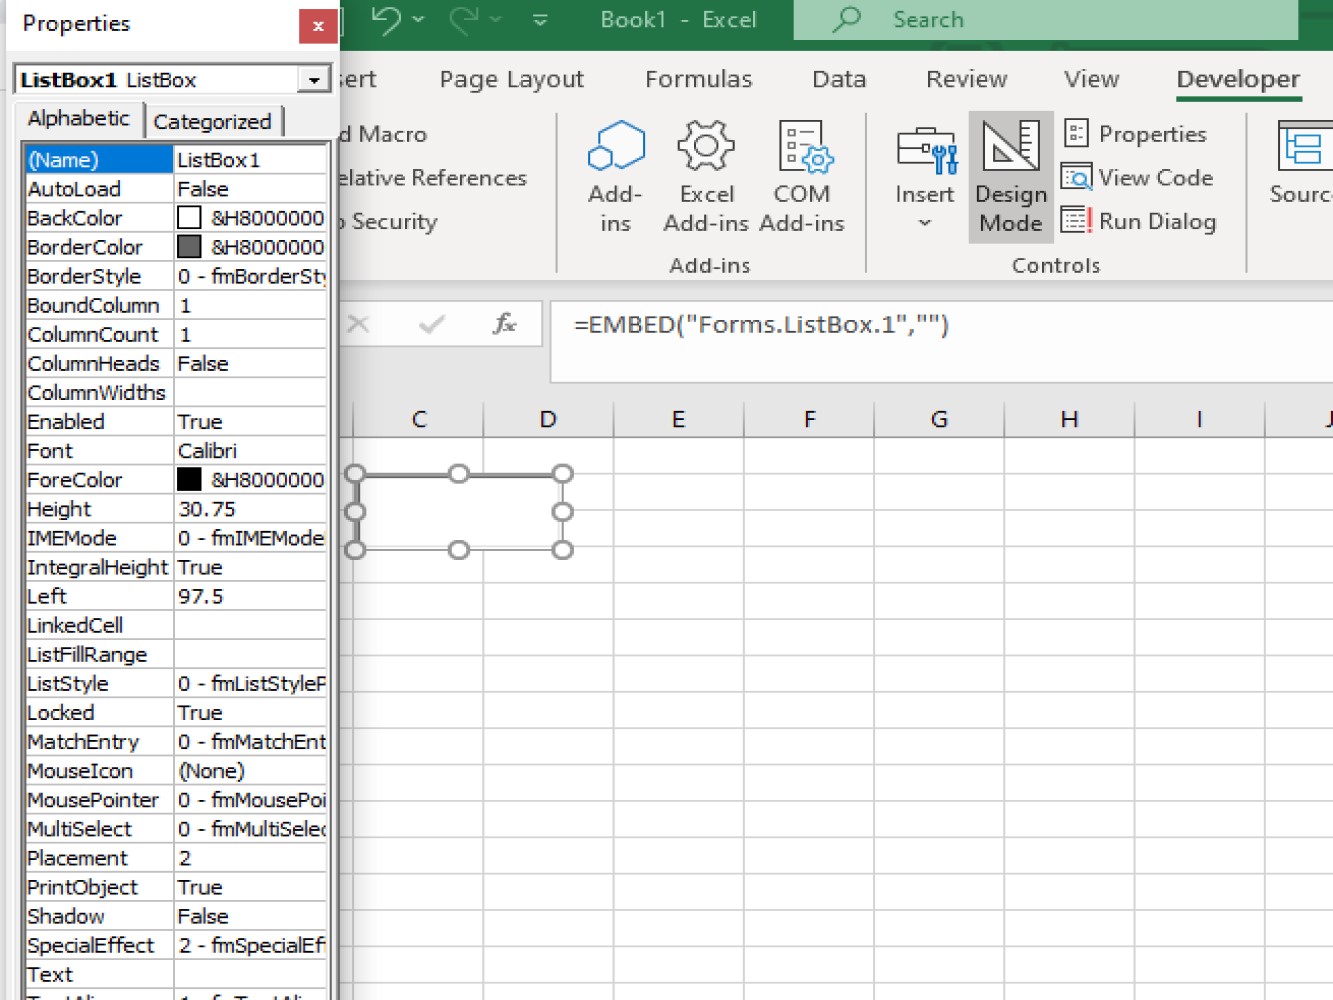
Note: The Developers tab should be clicked so you can change the name of your listbox.
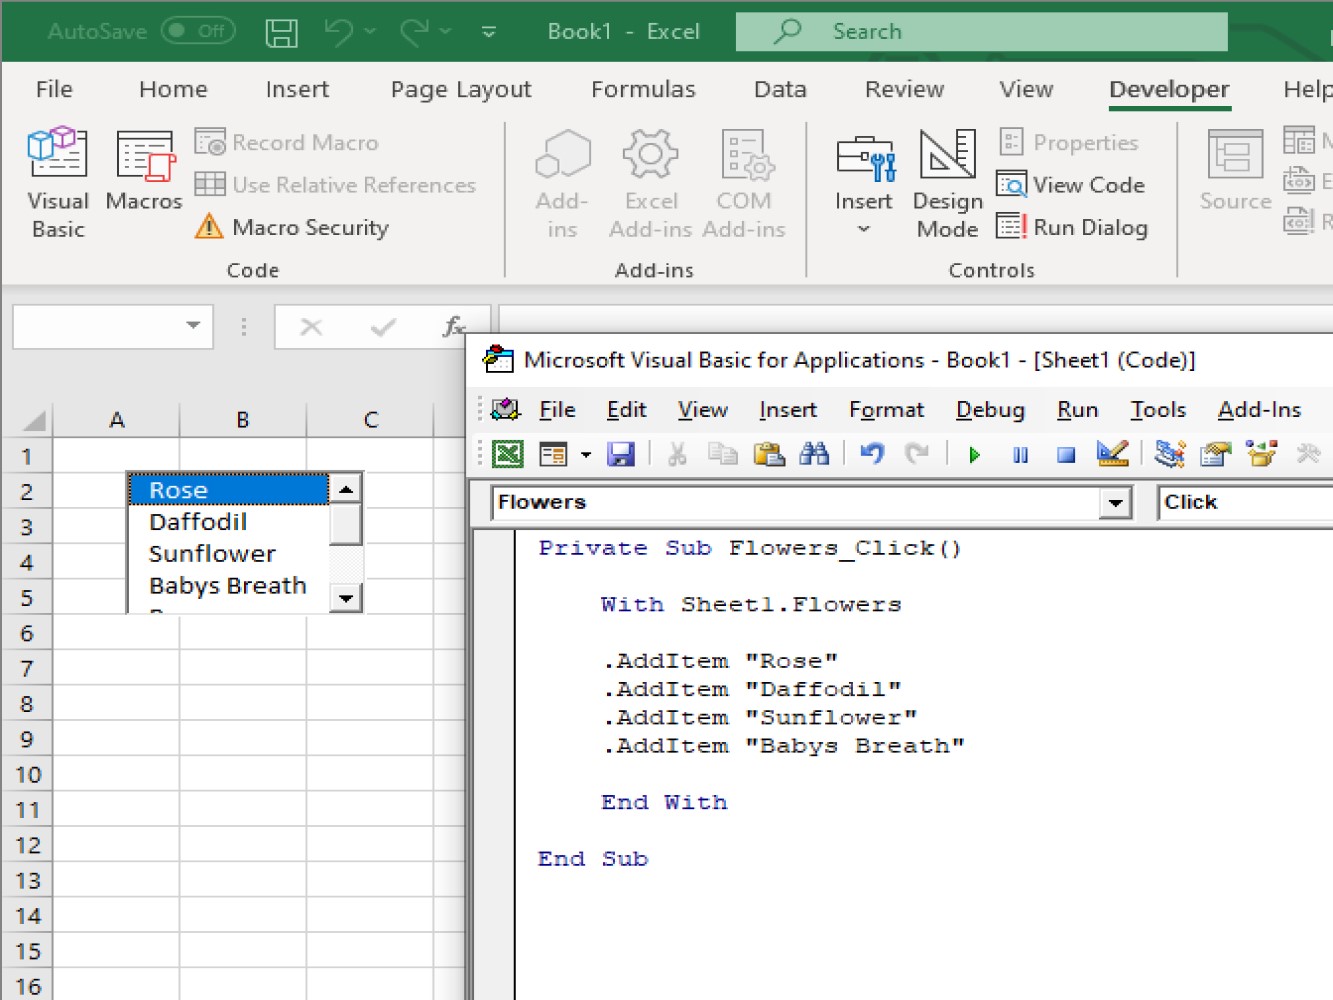
- We now go to VBA by clicking on **view code**.
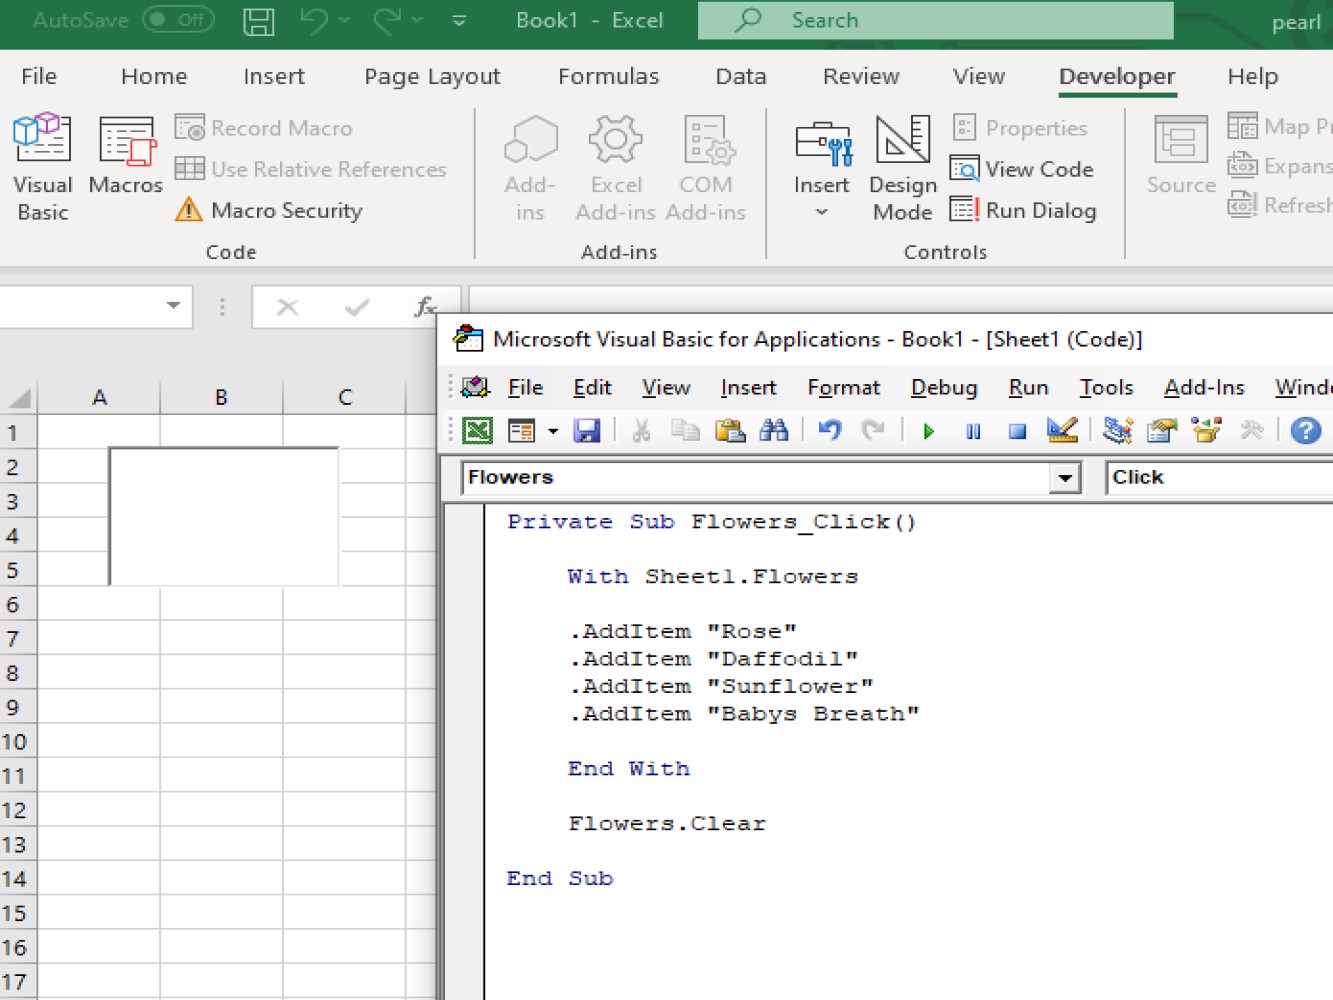
- Start creating your code in the VBA window.Code:
Private Sub Flowers_Click()

With Sheet1.Flowers

.AddItem "Rose"
.AddItem "Daffodil"
.AddItem "Sunflower"
.AddItem "Babys Breath"

End With

End Sub
Here’s a quick explanation of code above:
- This is your **sub code**:Private Sub Flowers_Click() End Sub
- You need to indicate what sheet you are working on. In our case, we are working on *Sheet1*. But if you are working on Sheet 2 or 3, just replace the sheet's name. and ***.Flowers*** is the list box's name.With Sheet1.Flowers
- You can now add the list items you want shown in your list box..AddItem “Rose” .AddItem “Daffodil” .AddItem “Sunflower” .AddItem “Babys Breath”
Below is a screenshot of the result after running the code:
If you want to delete your text inside your list box, we need to add the following:
Flowers.Clear
Flowers is the Listbox’s name plus .Clear to use the clearing function on the list box.
Code:
Private Sub Flowers_Click()

With Sheet1.Flowers

.AddItem "Rose"
.AddItem "Daffodil"
.AddItem "Sunflower"
.AddItem "Babys Breath"

End With

Flowers.Clear

End Sub
See the result below after adding the clear function:
Using a list box is also useful when you want to place a user form.
Finding Values listed on the List Box
Code:
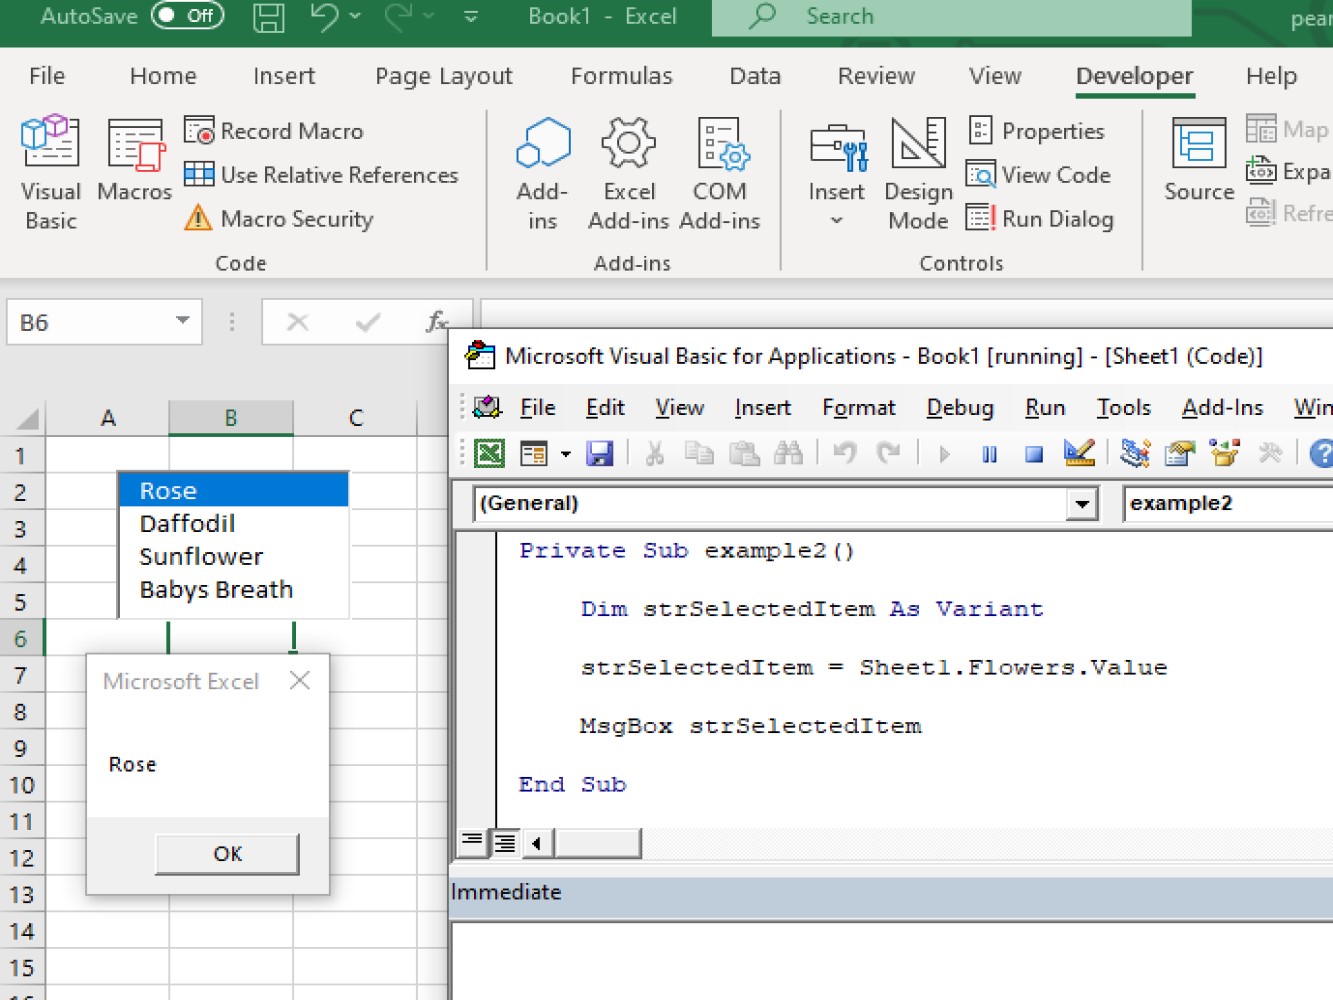
Private Sub example2()

Dim strSelectedItem As Variant

strSelectedItem = Sheet1.Flowers.Value

MsgBox strSelectedItem

End Sub
Code explanation:
- We have used the *String method* in creating code for showing on the message box the selected located inside the list box.On the result below rose returned on the message box because we have selected rose.
You can see the result below:
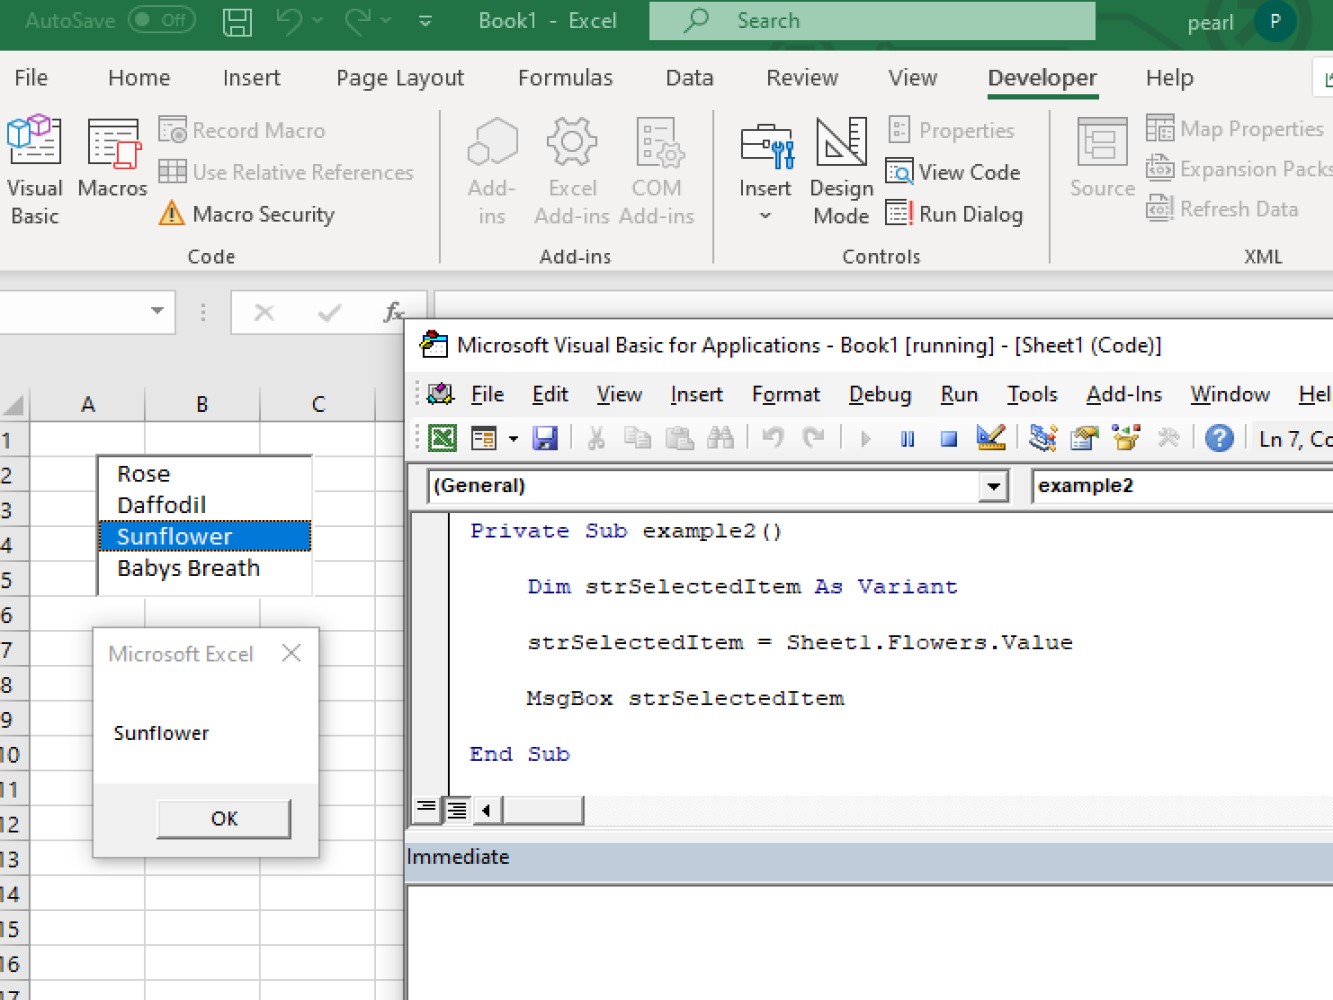
But if we have selected sunflower this would be the result.
Code:
Private Sub example2()

Dim strSelectedItem As Variant

strSelectedItem = Sheet1.Flowers.Value

MsgBox strSelectedItem

End Sub
You can see the result below:
Properties of Listbox
Below is a list of some of the properties for a ListBox.
- BackColor - this is used to specify the background color.

- BorderColor - this is used to specify the color of the border object.

- BorderStyle - this is used to specify the border type we wished to be used.

- BoundColumn - this is used to identify the data source in the ListBox.

- Cancel - this is used to cancel the properties in the window.

- Column - this is used to provide a reference in a column if you have more that one column in your ListBox.

- ColumnCount - this is used to specify the number of the displayed columns in the Listbox.

- Font - this is used to define the characteristics of texts.

- ForeColor - this is used to specify the object's foreground color.

- TextAlign - this is used to specify how the alignment of the texts should be.

- TextColumn - this identifies Listbox's column stored in the text property.
Methods used in Listbox
Below are some of the methods used in creating a Listbox:
- AddItem

- Clear

- Move

- RemoveItem

- SetFocus

- ZOrder
Conclusion
This has been a quick tutorial about creating listboxes in Excel using VBA. We hope that this helps you create more usable worksheets. Thanks for joining!