In Microsoft Excel, a named range refers to a range of cells to which a user has assigned a particular name. The ability to name a range is a handy feature of Excel that is often overlooked. Named ranges can simplify a complex spreadsheet or macro and make your formulas easier to understand. In this article, we'll discuss named ranges in more detail and walk through the process of creating an Excel named range.
As we mentioned earlier, a named range is a range that may consist of a single cell or multiple cells in the spreadsheet. This range is given a name that can be used instead of a traditional cell reference in Excel formulas, macros, graphs and more. Referring to a range by the name "ShippingRate" instead of a traditional cell reference like Sheet1!$B$3 will make your spreadsheets and formulas clearer and easier to debug.
Before you proceed with this tutorial, make sure you have the latest version of Microsoft Excel installed on your computer. You should have some basic knowledge of Excel and understand how to use different formulas and functions in order to follow along with our named range examples.
Now that we've reviewed the necessary prerequisites for this tutorial, let's look at the process of creating a named range in Excel. Imagine that you have a list containing data about people who bought cars in the year 2018: name, contact information and the price of the car. We want to select a certain range of cells and assign it a readable name that we can use in our Excel functions and formulas. In this section, we'll see how we can use three different methods to create a named range in Excel.
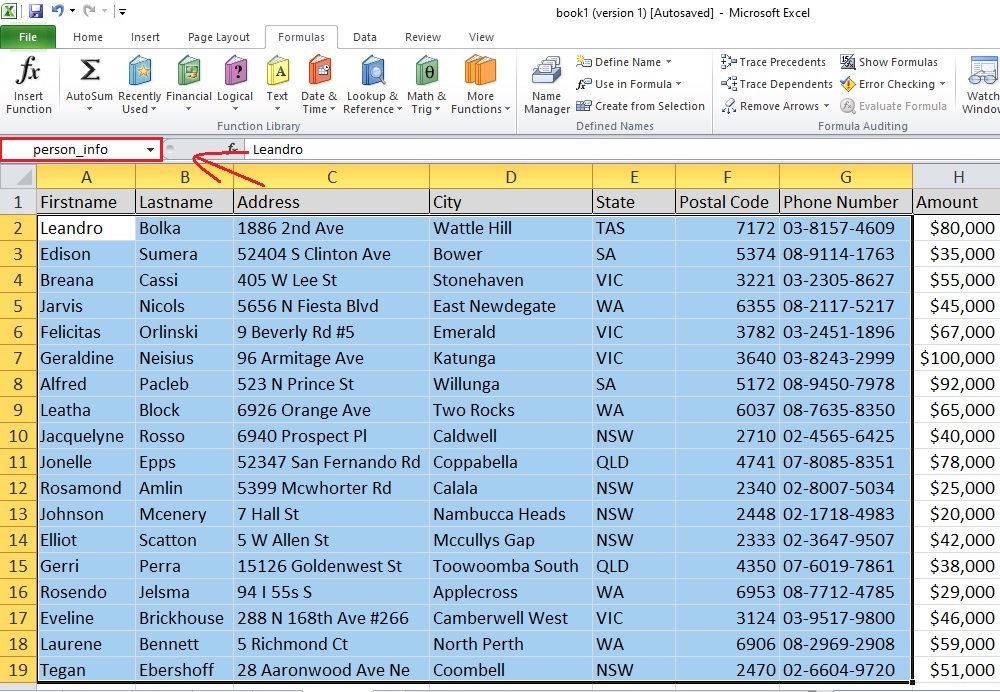
Our first example will show how to create a named range in Excel using the name box.
The name box is located before the 'fx', or formula, box at the upper part of the cell blocks. In the screenshot shown below, you can see that we selected a range of cells in the spreadsheet and gave it the name 'person_info':
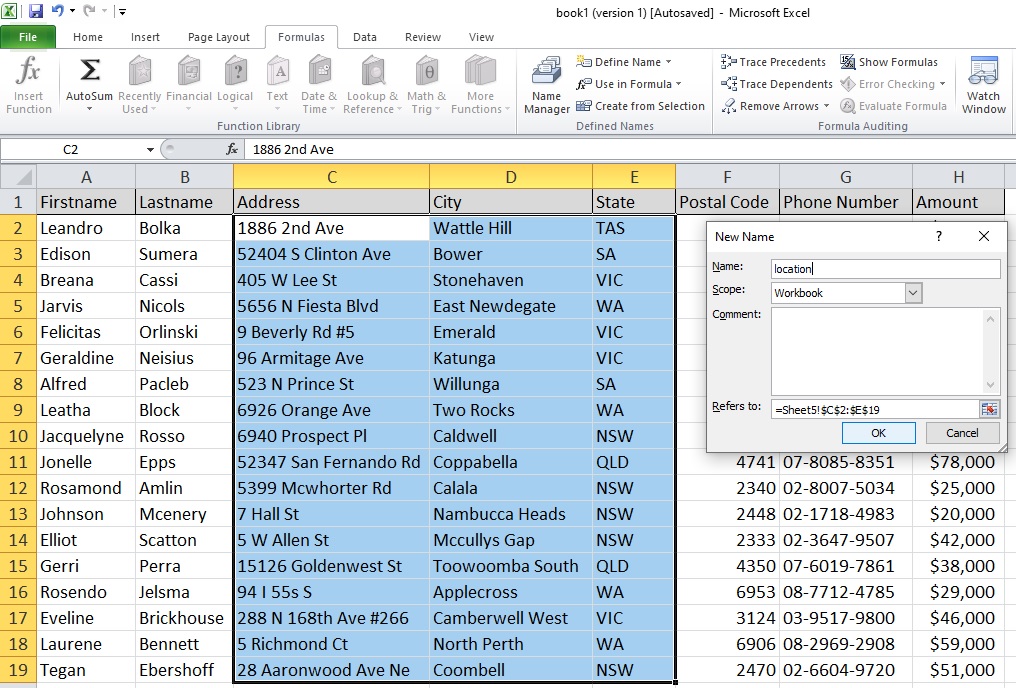
In our next example, we'll use the Define name button, which is located within the Formulas tab in the Defined Names group.
When you click this button, a dialog box will pop up asking for a few pieces of information. You'll need to supply the name of the selected cell range and a description. You'll also need to define the scope for the named range, with the default scope being the entire workbook. Last but not least, you'll need to specify the cell references for the range. You can see what the dialog box looks like in the following screenshot:
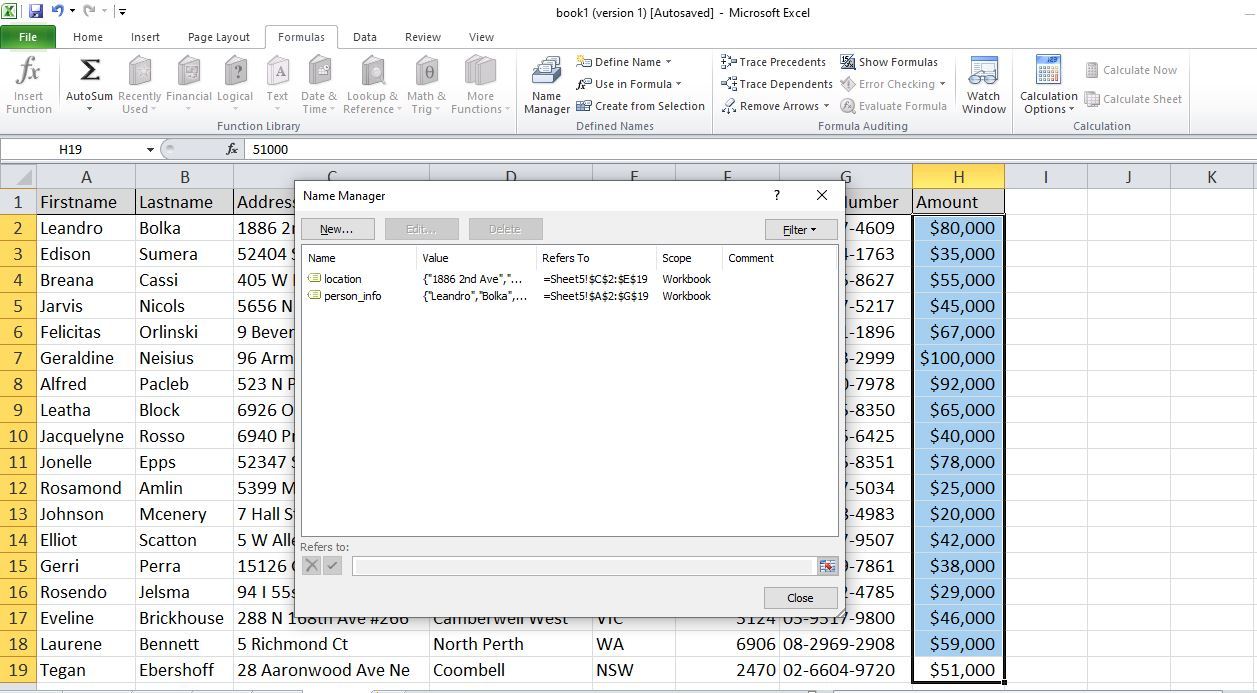
Our last example will show how to create a named range in Excel using the Name Manager button. You can find this button in the same place as the Define Name button; alternatively, you can use the keyboard shortcut 'CTRL' + 'F3' to access it quickly.
The Name Manager button will bring up a dialog box displaying all the saved named ranges in the spreadsheet. You can add a new named range by clicking the Create New button at the upper left corner of the dialog box-- you'll get the same dialog box that you saw when you used the Define Name button:
When you're working with data in Excel, it's easy to get bogged down by complex cell references. Using named ranges can simplify these references, making it easier to read and debug your formulas, macros and functions. In this article, we provided an introduction to named ranges and looked at three different ways you can create a named range in a spreadsheet. With these step-by-step instructions, you'll be prepared to implement named ranges in your own spreadsheets and reap the benefits of this useful Excel feature.