I am going to write an article explaining the guidelines and functions of the VBA excel offset.
VBA Offset Function - in Excel is defined as a reference function. The function will return a specific cell. It will help us if we wanted to move from a certain cell to a different one. Whether moving upwards, downwards, going to the left, or going to the right, we can use the offset function.
We have two different arguments in offset function:
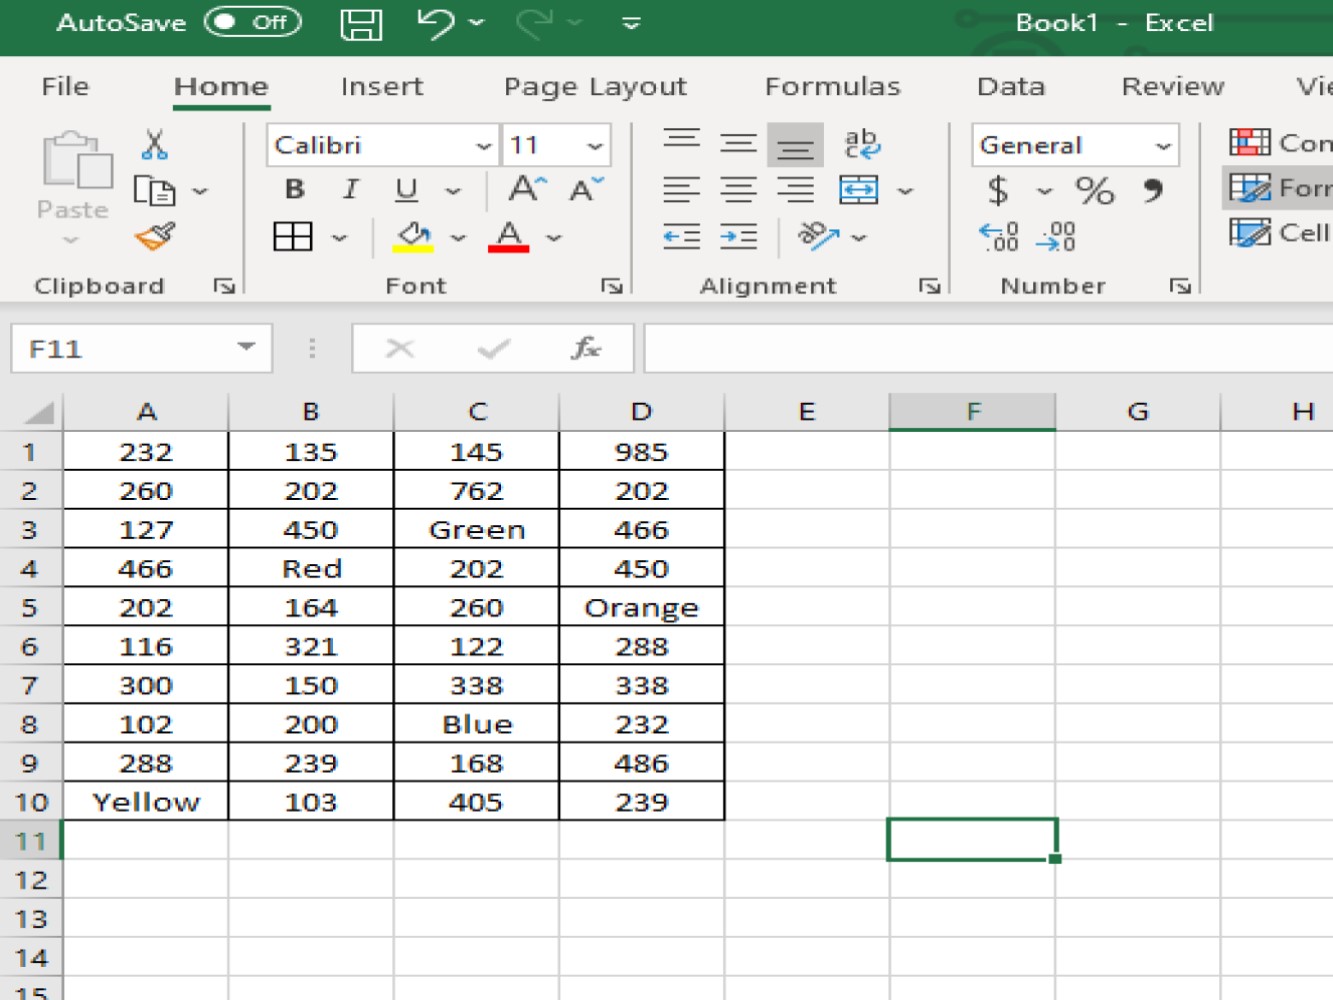
See the below worksheet as a reference for the examples below:
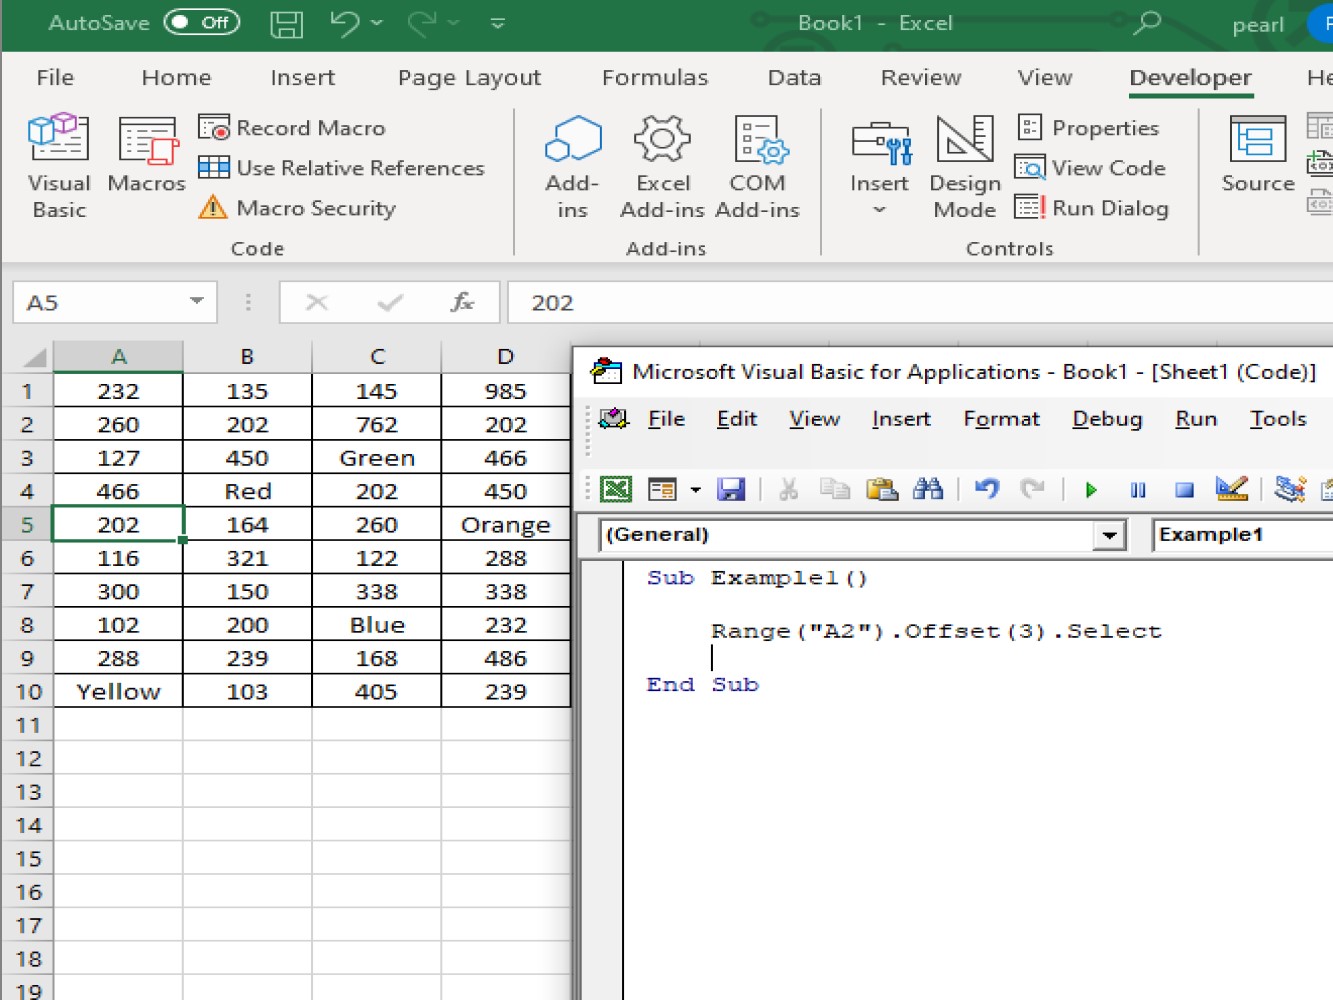
In this example we want Offset function to select cell: A5 so we'll be encoding my Range as A2, then Offset by 3 rows, so if I run the code, I will be getting A5 which gives the result as 202.
Here's the code:
    Sub Example1()

        Range("A2").Offset(3).Select

    End Sub
Code explanation:
Range("A2") - this defines our cell range.Offset(3) - this will indicate to VBA that we want to move down 3 rows after A2.Select - this will indicate to VBA that we are using select method.The result of the above code will be:
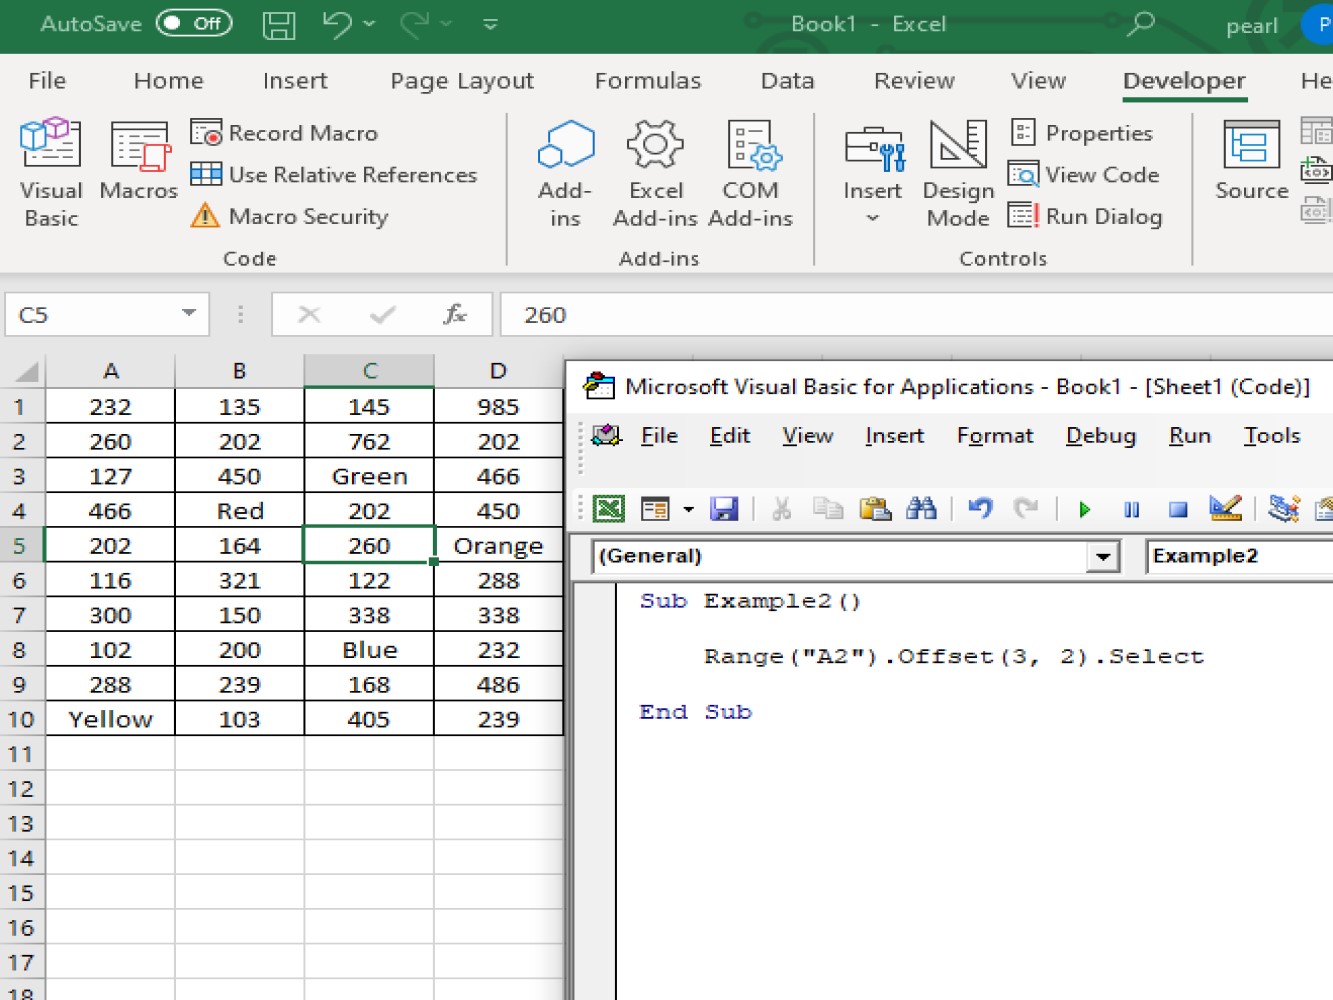
For this next example we will use the same data, but we will use a column offset to choose C5.
See the code below:
    Sub Example2()

        Range("A2").Offset(3, 2).Select

    End Sub
Range("A2") - this is our cell range.Offset(3, 2) - this defines our offset range. This part of the code will indicate that VBA needs to move 3 rows downward and 2 columns right.Again, like example number 1, we need to input Select in the code to indicate that we are going to use the select method.
The result of the code will point out to the cell we are looking for, C5.
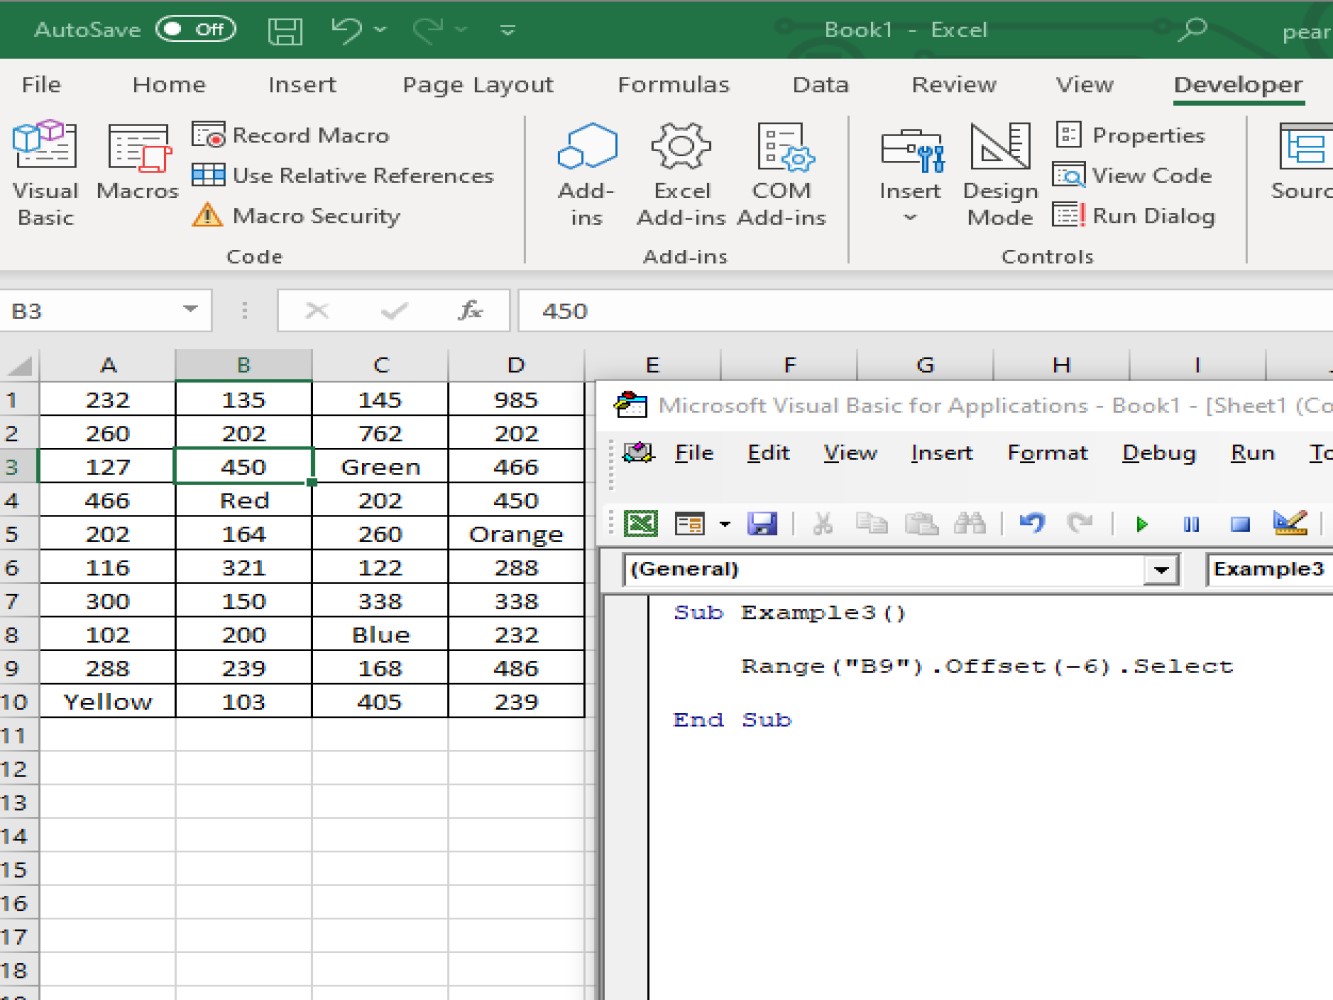
Using cell offset, we can select cells through an offset from a current cell. For example, you are in B9 and you wanted to select B3.
    Sub Example3()

        Range("B9").Offset(-6).Select

    End Sub
Since we will moving upward, we used the negative (-) sign. In case you wanted to move downwards, you can enter a positive (+) sign or no sign, just the number like on example #1.
And the result of the above code will be:
Let's go over another example:
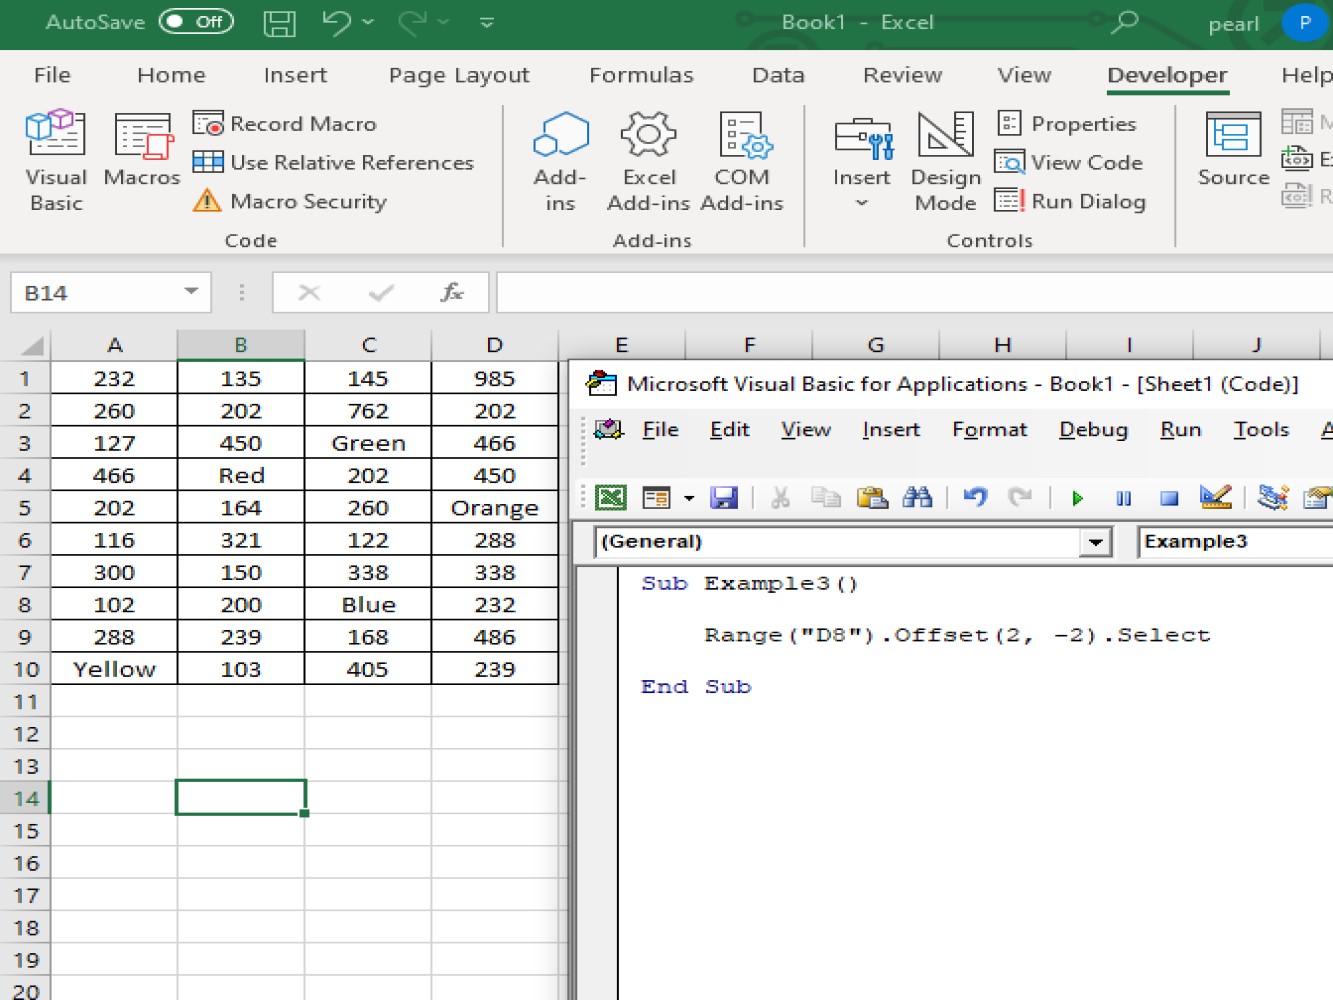
Let's say we have D8 selected, then we wanted to select B10. From D8 we need to move down 2 rows then we need to move to left by 2 columns, let's see below code:
    Sub Example3()

        Range("D8").Offset(2, -2).Select

    End Sub
And the result of the above code will be:
In this article we have shown you how to use the Offset function to programmatically move your cell selection. We showed a couple different ways to use the function so that you can understand the flexibility of this function. We hope you're able to use this method to create great Excel worksheets.