In this article we will go through the basic usage of VBA Excel Save and Save As.
In order to follow along you'll need to have Microsoft Excel installed on your computer.
There are two ways to save a file using VBA Excel, the first is Save and the other is Save As. If you're saving a file to a different location, use Save As. If you want to perform a normal save in the same location use Save. In a regular Excel worksheet, you can save as by pressing F12 but in VBA we have different macro codes to perform the save.
Let's look at an example of using Save:
Sub Example1()

Workbooks("Book1").Save

End Sub
The above code allows you to Save the current contents of the workbook in the current location. Now let's take a look at using Save As:
Sub Example1()


Workbooks("Book1").SaveAs "C:\ExcelFolder\2020\My Excel Examples", FileFormat:=xlWorkbook

End Sub
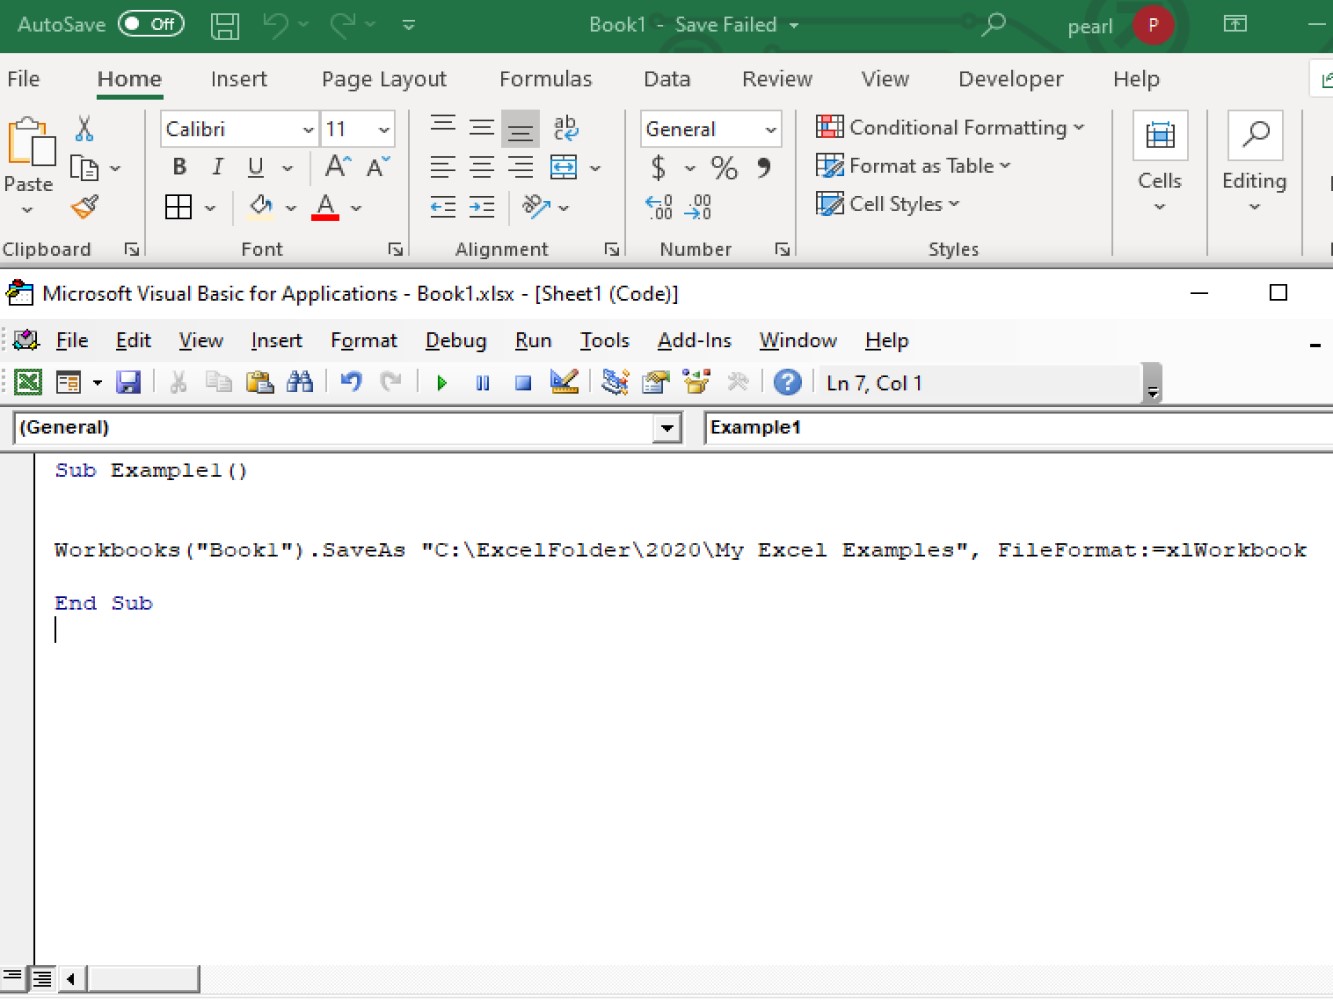
The example code above allows you to save the workbook in a new location. This is why the Save As function takes in the extra argument where you specify where to save the file.
Workbooks("Book1").SaveAs ** - this specifies that we want to perform the **Save As method
C:\ExcelFolder\2020\My Excel Examples - this is argument where you specify where you want the workbook to be saved.
We can create a backup sheets even when you are working for a couple of worksheets at once. To do this you'll need to use for loops.
To perform Save As on multiple workbooks you can use something similar to the sample code below:
Sub Example2()

Dim Wb As Workbook
For Each Wb In Workbooks
ActiveWorkbook.SaveAs "D:C:\ExcelFolder\2020\" & "My Excel Examples" & ".xlsx"

Next Wb

End Sub
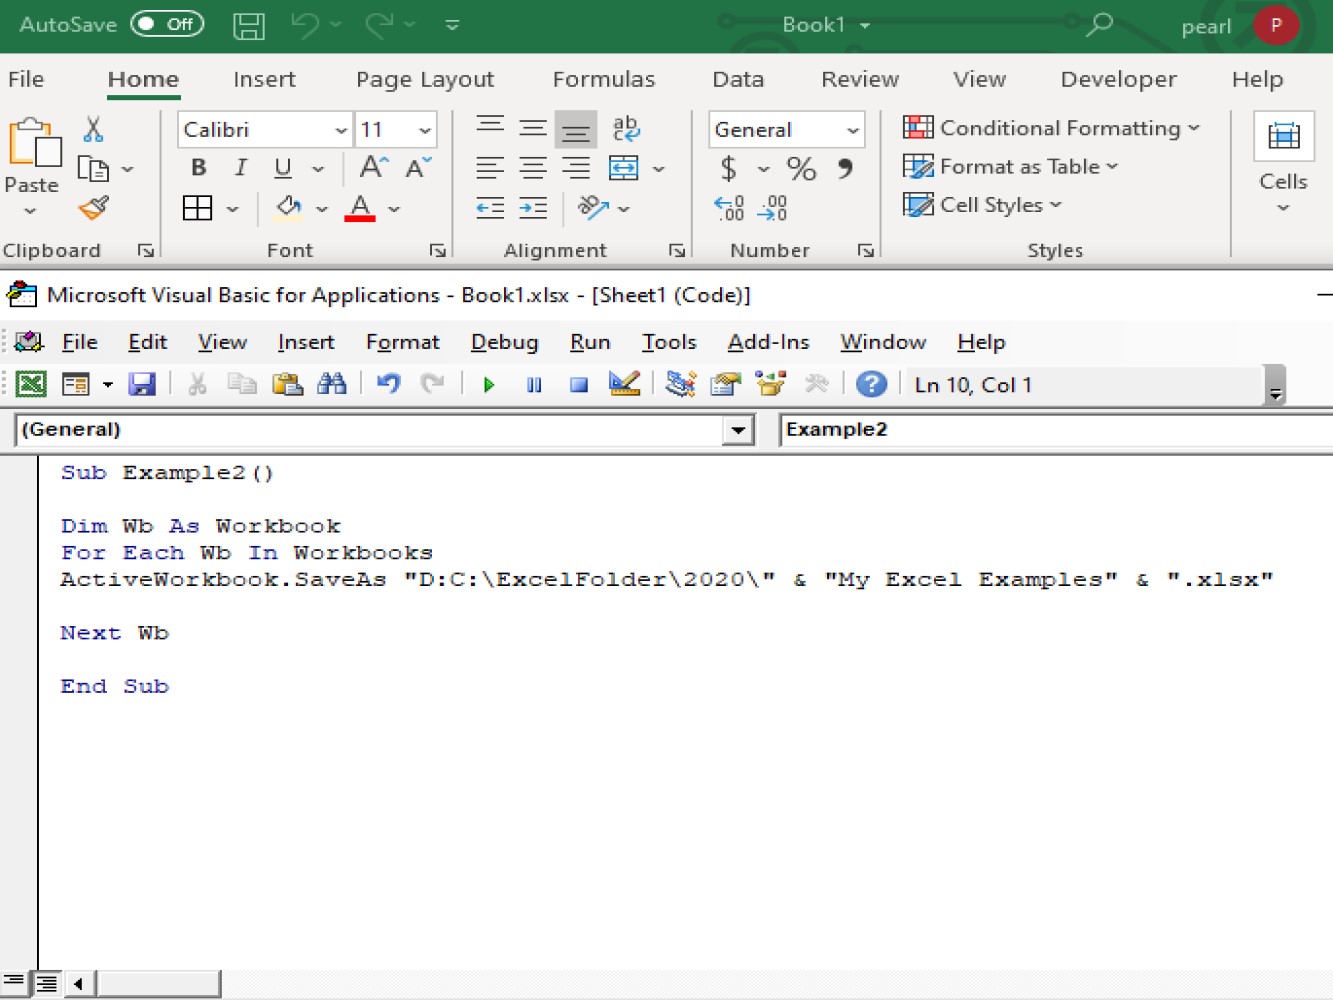
This sample code lets us save to our folder path. After running the code, it will ask you to select the destination folder path, just select a folder and click okay.
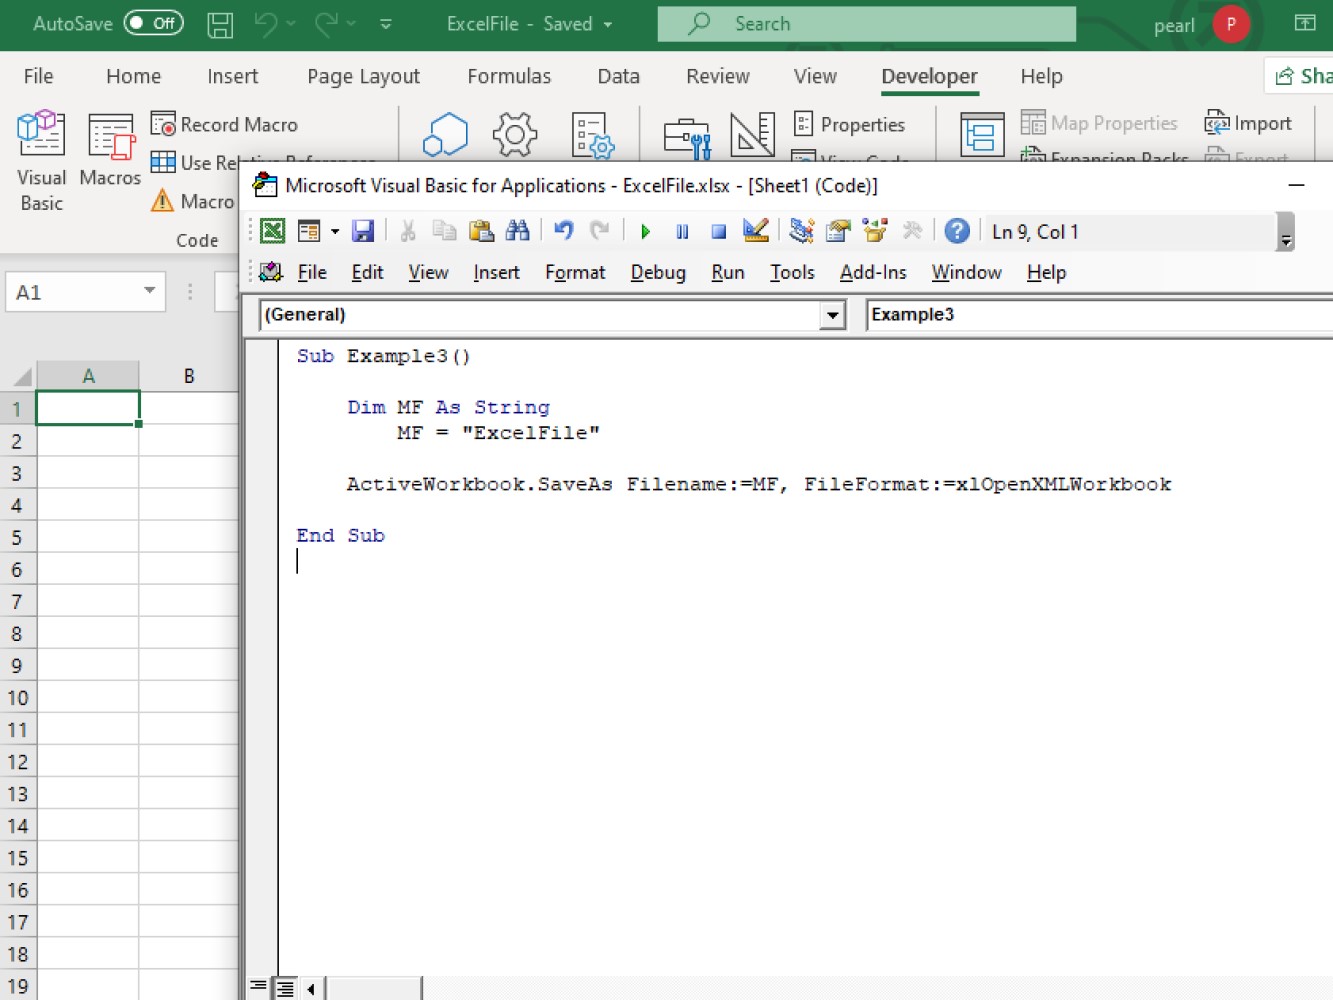
Let's go over another way to Save As. See the sample code:
Sub Example3()

Dim MF As String
MF = "ExcelFile"

ActiveWorkbook.SaveAs Filename:=MF, FileFormat:=xlOpenXMLWorkbook

End Sub
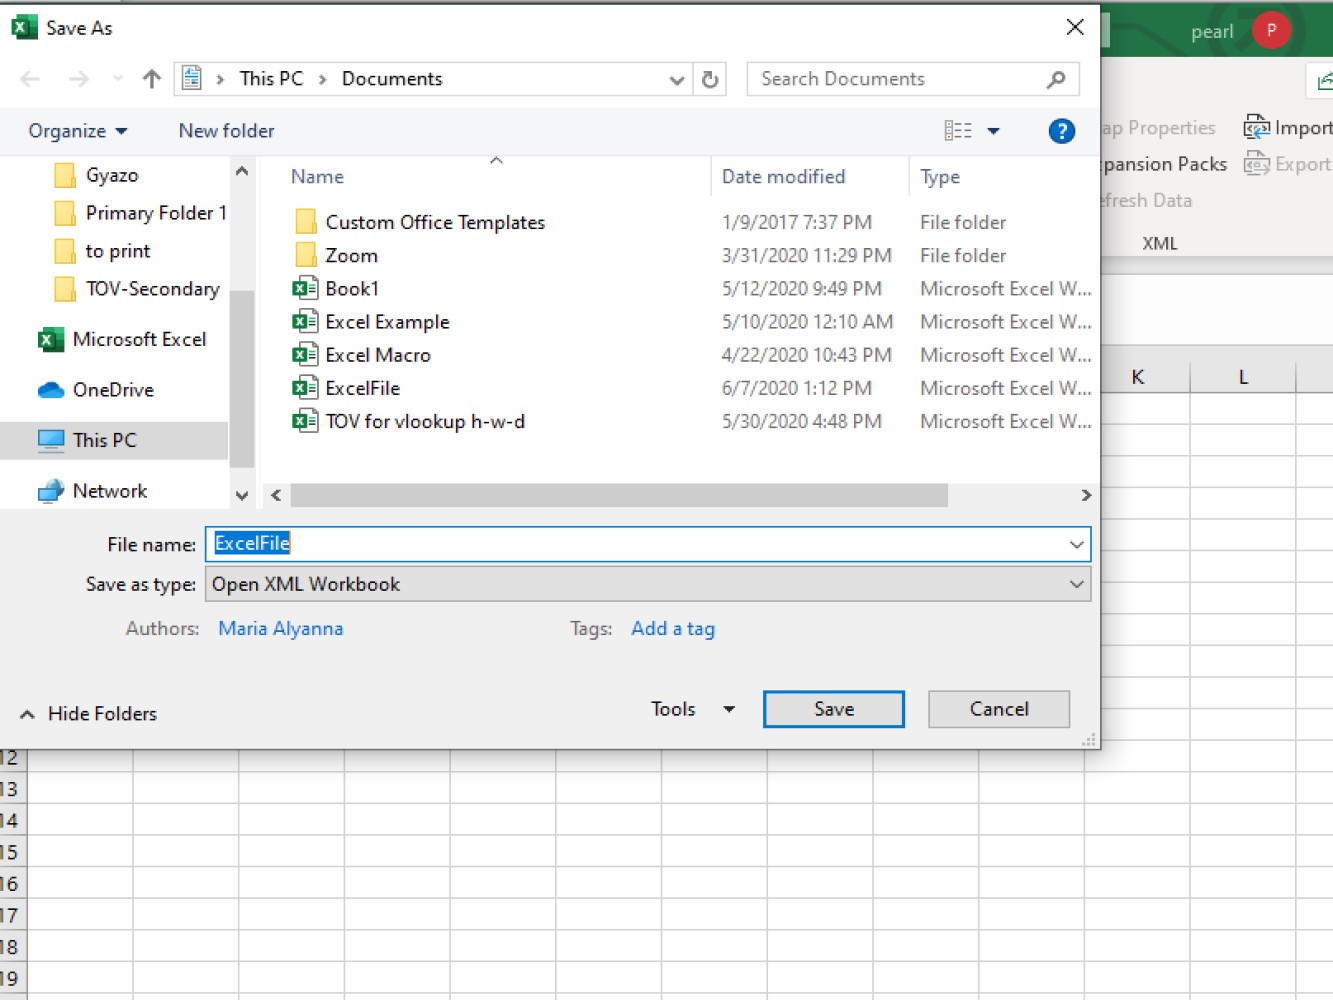
Using the string method, you can perform Save As on a file with writing the name of the file you wished to be saved. See the result below:
When we are saving the file using string, we have already encoded the name of the file we wanted to be saved. But in this case, a dialog box will open and ask you to specify the name of the file.
See code below:
Sub Example4()

Dim MF As Variant
Dim fileType As String

fileType = "Open XML Workbook (*.xlsx), *.xlsx, CSV (*.csv), *.csv"

myDialogBox = Application.GetSaveAsFilename(fileFilter:=fileType)

If myDialogBox <> False Then
ActiveWorkbook.SaveAs Filename:=myDialogBox
End If

End Sub
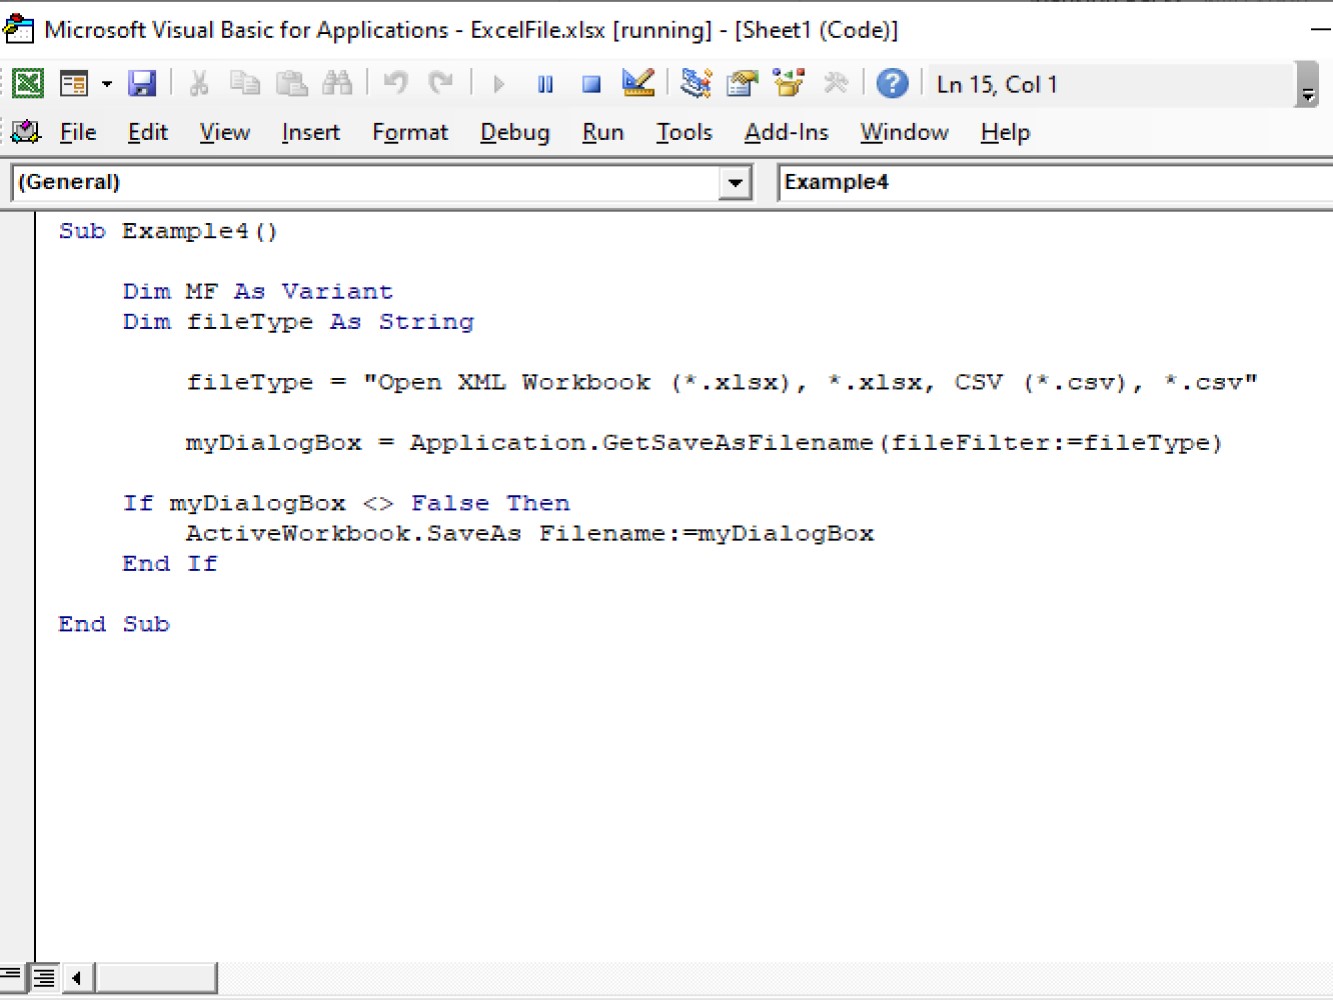
Now let's take a look at the result after running the code:
A dialog box will pop-up and you'll need to specify the file name you wished to save. After inputting the file name, click on Save to save the changes made.
We have shown a few different ways of performing Save and Save As using VBA Excel and we hope you can use what you've learned here into your VBA macros.